
12/03/2018 - CAD
Well it was possible. Katy spent the first morning going through the basic techniques we'd need to realise our design, then left us to it.
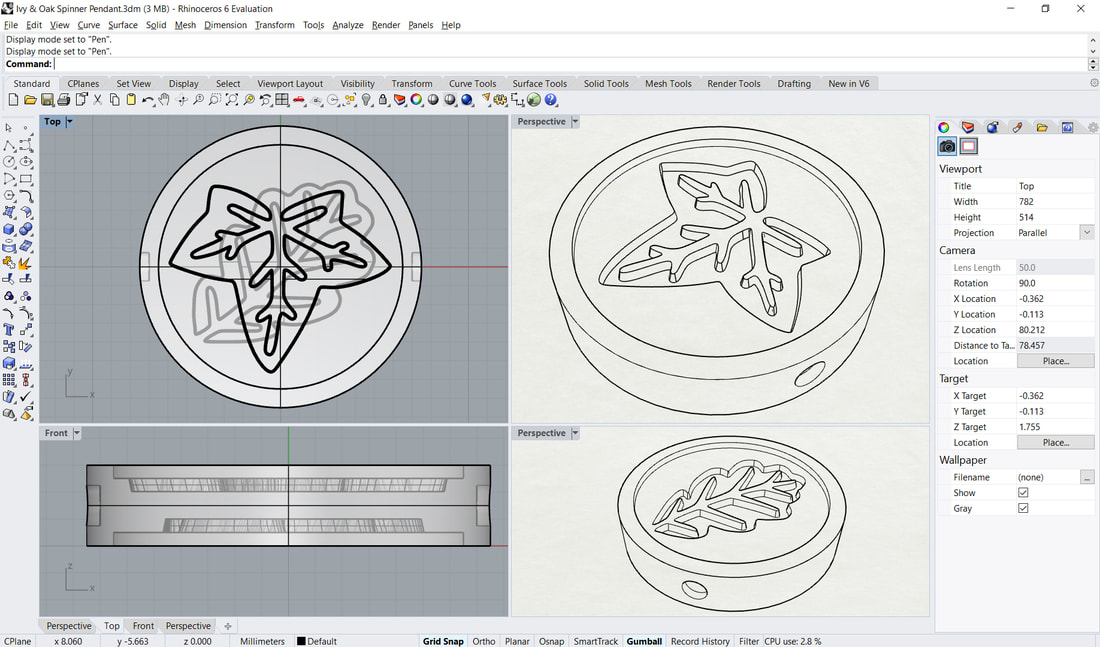
By the end of that day, I had one side of one design done and the next day I'd completed two whole concepts (4 sides total).
I admit I got a bit confused with recreating my hallmark. Because it would be used to print, the lettering had to be reversed. However my initials are vertically symmetrical, so spinning 180deg corrects this reversal (leaving me wondering if I'd done it right).
On the Thursday, Dauvit did a couple of checks on each of our designs and made a machine readable file to send off for printing.
I don't have time to recreate the whole process and write out the instructions long hand, so I have typed up the scrappy notes I made on the day.
|
CAD using Rhino
Right click movesviews around Shift right click centres Grid snap Major lines every 10 Circle from centre Click on origin Command – diameter, type 15 Command – ExtrudeCrv, solid =yes, type 3, enter Change each view to shaded Dimples Circle from centre Click to position Type 1.5 Command – ExtrudeCrv, 2 enter Gumball |
Move to origin
Click arrow & type 1.5 enter Grid snap off Drag arrow to outside of coin Hide disembodied circle Click on mouse roller Click on grey lightbulb Select cylinder Click arrow, -0.5 enter Mirror, click above then below coin Boolean difference Select coin, coin Select cylinder, delete input = no, enter Move cylinders out, should have dimples Repeat to indent in top and bottom |
Osnap, end, near, mid, quad
Mirror Own design Must have taper so wax doesn’tget stuck Select shape Offset, 0.1, out Move offset line down 0.5 Sweep, 2 rail sweep Straight line Snap quad to quad, and again Surface from 3 or 4 Sweep 2 rails Various lines make up shape Trim and join Import, picture frame |
After spending the Monday & Tuesday doing this CAD model, I spent Wednesday modelling my final kinetic piece for my Fine Jewellery optional module. That was a complicated design and I'm now quite confident I have a good understanding of the Rhino software (using computers just comes naturally to me).