Heather Coleman Jewellery
  • Home
  • Collections
    • Mini collections
    • "Simplicity"
    • "Hedera" ivy - silver
    • "Hedera" ivy - gold
    • "Fauna" animals
    • "Lulu" floral
    • "Electric" anodised
    • "Hylle" medieval initials
    • "Madison" gothic
    • "Rosa" rose
    • "Quercus" oak
  • Unique & Bespoke
    • One of a kind
    • Stacking rings
    • Bespoke
  • Lessons
  • About
    • About me
    • Awards & Exhibitions
    • Testimonials
    • Contact
  • More
    • Gallery
    • "Masquerade" Hare
    • Videos
    • Terms & Conditions

Basic Rings

26/9/2017

 
First couple of days of our first module and, as I expected, we're making basic rings.
We started with a simple D-shaped wedding band.  Made in brass that had been shaped with the rolling mill.
As I HATE wasting silver, I've always cut my wire to length and simply soldered the ends together.
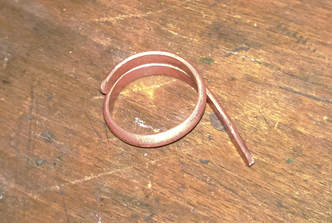
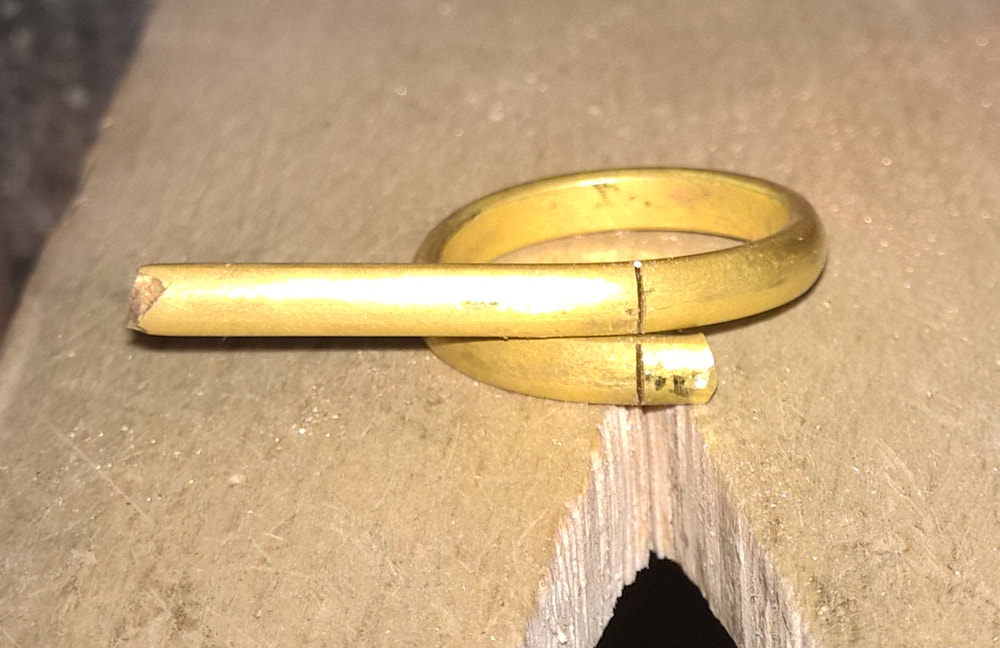
However we used the other technique I've heard about, bending the wire round until it overlaps and then cutting through the two widths (as shown below).
I can see merit in both methods and I think time will tell which one I opt for in the future.  However you can be pretty sure the size will be accurate with the method we used here (we were aiming for an N), as the ring is pretty much fully formed and it can be measured and/or tried on.
I have in the past, cut wire to length very precisely, and mysteriously ended up with a ring of totally the wrong size.
Edit: As it turns out, all these rings came out at O½, so not quite as accurate as I thought.
Picture
Picture
Picture
Once the wire has been cut through, I aligned the ends with gentle taps with a mallet, and then ring pliers when the material got a bit springy.
I could then try the schools soldering setup for the first time.
The torches are of course HUGE, presumably fed off a building wide gas supply.
The process room has 4 stations, all under a big extractor canopy.  This means it's really dark in there.  Great for annealing, but it's very hard to see when solder flows.
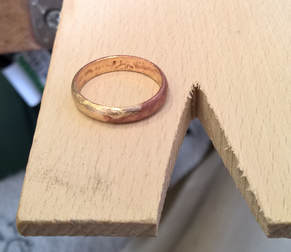
So, after soldering I gave the ring a quick tap on a mandrel to make sure it was round and tidied it all up with a file (no polishing allowed yet).

Picture
Picture
Picture
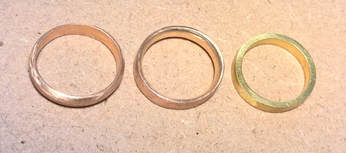
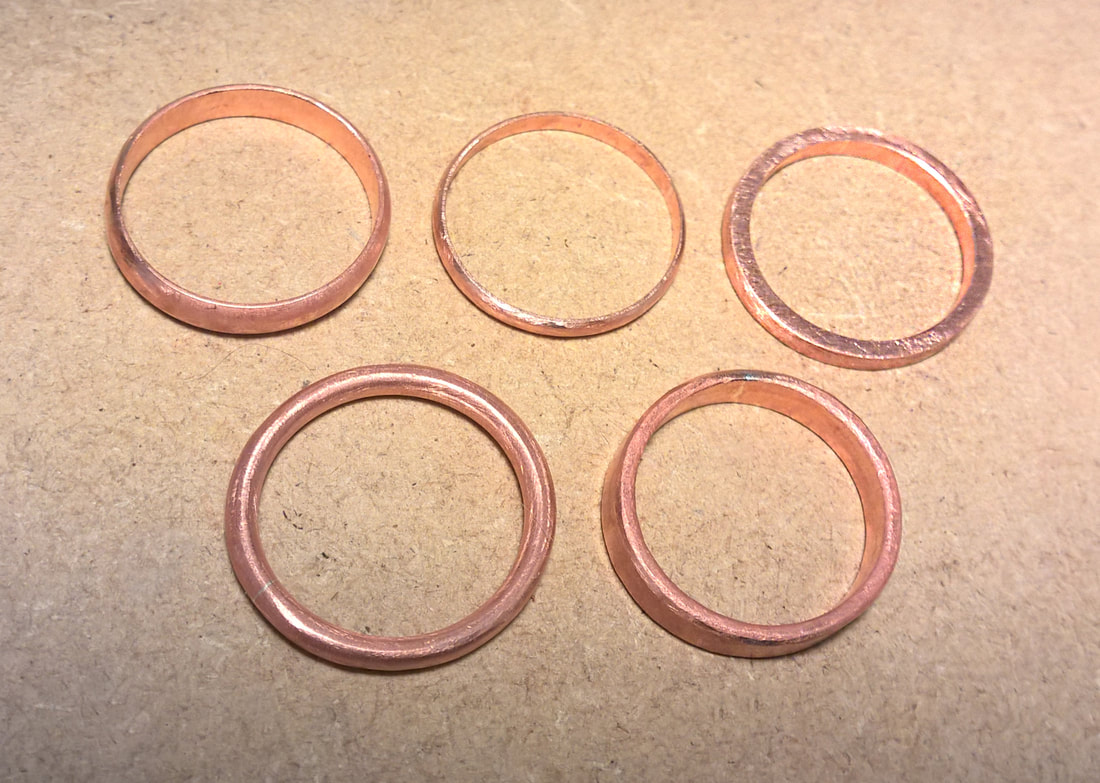
In total, I made 8 rings using this process (starting with round rod).

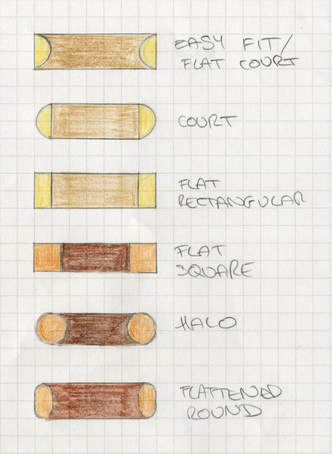
3 in brass:
- Court (D-shaped cross section as above)
- Easy fit/flat court (D-shaped wire, curve on inside)
- Flat rectangular

And 5 in copper:
- Court
- Narrow court
- Flat square
- Halo (round cross section)
- Flattened round (flat with curved sides)

Comments are closed.
    Go to First Post

    Contents

    Blogging
    Basic Rings
    Piercing

    Index

    All
    Basic Rings
    Blogging
    Piercing

    Archives

    November 2017
    October 2017
    September 2017

Picture
© COPYRIGHT 2025
ALL RIGHTS RESERVED
  • Home
  • Collections
    • Mini collections
    • "Simplicity"
    • "Hedera" ivy - silver
    • "Hedera" ivy - gold
    • "Fauna" animals
    • "Lulu" floral
    • "Electric" anodised
    • "Hylle" medieval initials
    • "Madison" gothic
    • "Rosa" rose
    • "Quercus" oak
  • Unique & Bespoke
    • One of a kind
    • Stacking rings
    • Bespoke
  • Lessons
  • About
    • About me
    • Awards & Exhibitions
    • Testimonials
    • Contact
  • More
    • Gallery
    • "Masquerade" Hare
    • Videos
    • Terms & Conditions